

Sunday, July 17, 2016
Here is my method for getting a pattern off of the bottom of the side view mirror so that I could cut a gasket out of some 1/16th EDPM to cushion it against the door top.
Finally here is also the right side mirror installed on the car. I was also able to re install the right side window regulator and motor in addition to the right door speaker.


Finally here is also the right side mirror installed on the car. I was also able to re install the right side window regulator and motor in addition to the right door speaker.


I sprayed the glass with this adhesion promoter before I gave it 3 coats of black Imron. I will post pictures of the result when I get my back glass back from the tinters.
You can see from the next two pictures that with the rear seat back installed there is not much room to spare to the back glass or the head liner for that matter as these seats fold forward to access the trunk. Having the Daytona glass is a real plus here as I would have had to cut these seats down in a stock Charger.
Also got my windshield washer nozzles installed on the hood and the lines run to them.


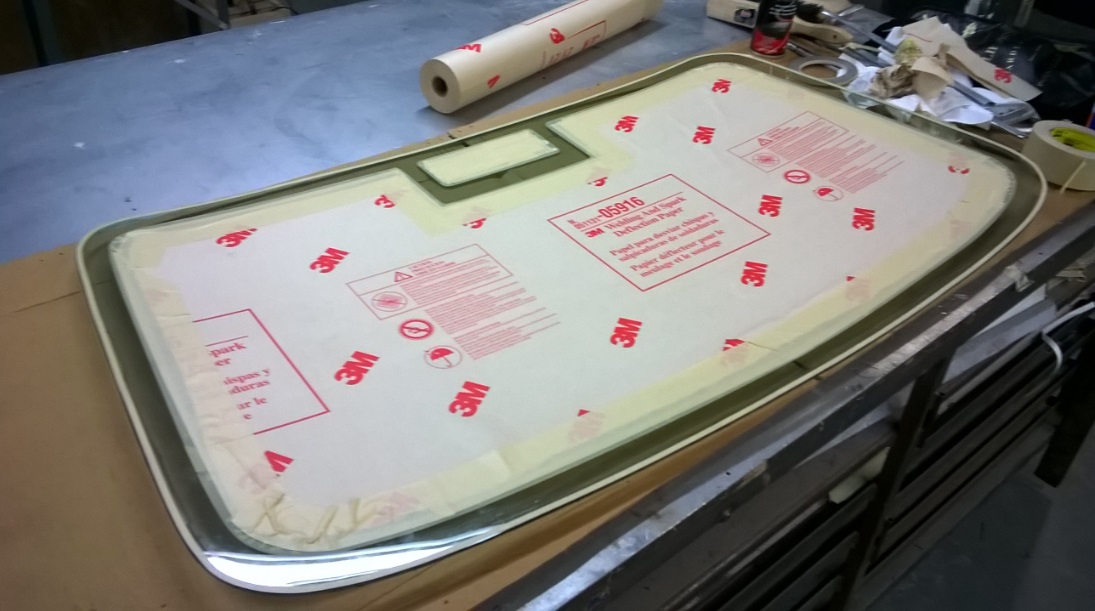
Once back on the work bench I taped off the under side to back paint a black border on the glass. Since the paint is not part of the glass as it would be if it was baked in at the factory I left a 1/4" border unpainted for the urethane to stick to the glass directly. I did the same treatment on the windshield.


Finally I wanted to black out the bottom of the rocker and the pinch weld to further define the side of the car. I decided to coat this area with spray on bed liner to also protect the area from road debris.
I did get the car on the ground and I hope to not have to put it on jack stands again before it is finished........ I said I hope. lol


I did get the car on the ground and I hope to not have to put it on jack stands again before it is finished........ I said I hope. lol


I messed around with a little badging on the rear wing. The SRT-8 logo that I ordered was cast metal and it was about 1/8" thick but fortunately it was hollow on the back. This allowed me to grind it off until it was only 1/16" thick so it lays nice and flat against the upright on the wing.
Under the front of the car just behind the front wheel tub there was a plastic cover to protect the E brake cable. I had to make an abbreviated one out of black aluminum because of alterations to the chassis in this location.


Under the front of the car just behind the front wheel tub there was a plastic cover to protect the E brake cable. I had to make an abbreviated one out of black aluminum because of alterations to the chassis in this location.


More small but time consuming stuff. The wires to the front side markers in the front air dam were dangling so I put them in a little plastic harness cover , made a "P" clip and got them tucked up and out of the way.
I got all four of the inner fender tubs re installed for the last time.
I also got my tail lights, rear bumper and back up lights installed.


I got all four of the inner fender tubs re installed for the last time.
I also got my tail lights, rear bumper and back up lights installed.


Exciting stuff......right?
My next project was under the front of the car behind the front air dam. The SRT-8 radiator is way taller than the 68-70 B body deal so there is quite a bit hanging down below. Fortunately when the car is on the ground you cannot really see this area at all. Never the less I had to make a panel to protect the lower radiator from debris and allow some air flow through it. I bent up some .040 pre painted black aluminum to create the cover. Since I don't have access to a louver stamp I went down to the home center and got an HVAC return air duct cover.


My next project was under the front of the car behind the front air dam. The SRT-8 radiator is way taller than the 68-70 B body deal so there is quite a bit hanging down below. Fortunately when the car is on the ground you cannot really see this area at all. Never the less I had to make a panel to protect the lower radiator from debris and allow some air flow through it. I bent up some .040 pre painted black aluminum to create the cover. Since I don't have access to a louver stamp I went down to the home center and got an HVAC return air duct cover.


Well as anyone who has worked on car projects knows the small BS eats up a lot of time and seems to go on forever. This weekend I had three days and was determined to just get all the work under the car done and get it down on the ground. I did but just barely.
First chore was to weld up my Frankenstein exhaust and install it under the car. I had to eliminate the resonator to fit it so I hope it doesn't sound goofy when I fire it up or have some weird harmonics.
Next I had to make a close out panel to cover the span between the end of the 06 under carriage and the rear roll pan. I made a cardboard template to fit the span and secured the 3/16 plastic panel with some stainless steel screws. The plastic is pretty tough stuff I got from work so it will take a beating under the car.


Subscribe to:
Posts (Atom)