Sunday, January 31, 2016

So I got the car out of the spray room and covered up so I could start working on some parts. I decided to start with the hood and trunk lid as they will be the same color. I had a little fabrication work to do to the under side of the hood in that I had to make some kind of closeout panel to hide the area where the extension was mended at the back of the hood.


Wednesday, January 27, 2016

Here you can see my caveman method in action. I stripped the car of all the masking tape and paper because a lot of it had been on there since August and I was afraid it might not come off if left on much longer. I  gave the car a decent clean out and got it out of the way so I could bring the body parts into the paint room to work on them over the next few weeks.


Tuesday, January 26, 2016


Well in case anyone was wondering how I move this 2 ton beast around by myself here are some pictures of how I get it around. First off the little wheels on the tire dollys are terrible with this much weight so just pushing it around is not possible. First I attach a 2"x 4" bar behind the wheel dollys either front or back depending on the direction I want to drag it. I attach a chain to the center of that and it is attached to a 2000 pound 12 volt winch. There are a couple of locations on the floor in the paint room and out in the shop where I can attach the winch to drag the car forward or back


Sunday, January 24, 2016

I followed up with 2 base coats and 3 clear coats of the two colors. Yeah I know it looks like black but in the daylight the color of the door jamb area looks dark silver and the trunk is a dark metallic grey. The final picture is a little trick I used to keep the paint out of the threads to the door hinge bolts. I cut the head off the same size bolt and cut a slot in it so that I could screw it in with a screw driver.


Saturday, January 23, 2016

Okay. So I finally got some color going on. It is just on the trunk rim, the inside of the gas hole and the door jambs and sill but it is color non the less.
The first picture is of the previously mentioned areas sprayed with Evercoat Slick Sand K-2 primer, After sanding that out (which took forever and killed my fingers) down to 400 I sprayed some activated sealer.


Wednesday, January 6, 2016

Man! These parts off the car really take up a lot of room. After I get the jamb work done and put some color on them I will have to drag the car back out of the spray booth and drag this stuff in to work on. I would say this is taking longer than expected but I really didn't know what to expect.  lol


Tuesday, January 5, 2016

Looked like I was ready for color right? Not quite. I had to strip the car back down to work on the door jambs ,trunk lid well, the back sides of the doors , the insides of the front fenders and the bottom side of the hood and trunk lid.  I made myself some profile cradles to keep those items from shuffling around while working on them.


Sunday, January 3, 2016

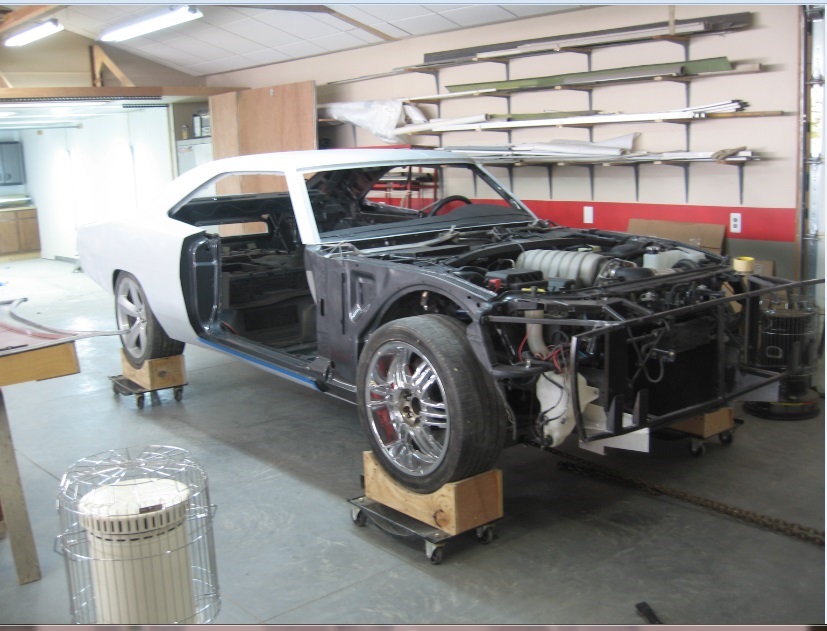
Well I finally got the outside of the body wet sanded down to 400. My daughter was visiting with her husband over the Christmas holidays and took these pictures with here new clip on wide angle lens for her I-phone.


Looked like I was ready for color right? Not quite. I had to strip the car back down to work on the door jambs, trunk lid well, the back sides of the doors, the insides of the front fenders and the bottom side of the hood and trunk lid. I made myself some profile cradles to keep those items from shuffling around while working on them.


These parts off the car really take up a lot of room. After I get the jamb work done and put some color on them I will have to drag the car back out of the spray booth and drag this stuff in to work on. I would say this is taking longer than expected but I really didn't know what to expect.