Sunday, February 15, 2015

Well . We have a saying at the shop I work in. "Our stuff is nice because we do it twice". Looks like I brought that mentality home. I had tried to use the 06 package tray cover and just extend the upper cover and it just didn't look right. Number one I picked the wrong covering which was a mottled gray. Number 2 because of all of the baby harness pick up points the cover sat way too high in the window. I cut all of those out so that I could lay a new panel made out of masonite a little flatter. I used a bit of sheet metal to transition the top panel to the vertical and drilled some sound holes in the top. I also put some 10/24 threaded studs in the sub structure so that I could mount the speakers from the bottom. They were top mount speakers but if they ever went bad the new rear glass would prevent removal.


On the same note of redoing stuff I realized after I made my "A" post covers that they were crowding the attachment points for the sun visors. No problem. I just moved the attachment points inboard a little.  I should have started with the driver side as that worked fine on the passenger side. On the driver side with the rear view mirror angled towards you the visor would not come down. So I move the attachment points back out. Now I had to make new "A" post covers that laid flatter against the "A"post. After a lot of head scratching I looked at the "B" post covers from the 06 and cut out some new ones. After a bit of carving and some reshaping with a heat gun I got lucky and they fit pretty good. The added feature is I was able to eliminate the small transition piece from the "A" to the door seal trim.


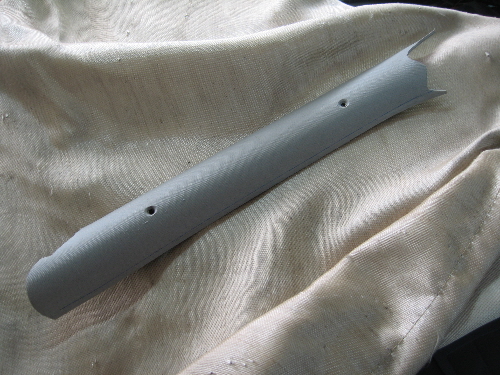
Here is a picture of the old left side cover and the new replacement cover.


Tuesday, February 10, 2015

Well I have been wondering if my wheel choice was o.k. because with the car so far from done it is hard to visualize what it will look like. So I took the picture that I took of the car with the tires and wheels mounted and isolated a tire and wheel and did a little photoshop work. I manipulated them to place them on the picture of the model I had built of this project and I think they are going to be o.k.


Saturday, February 7, 2015

Well I decided since I was working in the back of the car I would tackle modifying the rear bumper. I wanted to bring it in closer to the body both front to rear and side to side. I puzzled over how to modify the standard mounts and decided to throw them over board. I set some long bolts in place where the rear bumper mounts through the rear panel. I then cut the heads off. I drilled out the bumper. (No nice Charger bumpers were harmed in this modification) and slid it over the bolts until it was as close to the rear pan as I wanted and then I welded it up and cut off the excess. I removed the bumper and welded up the back side and all of the now un needed bolt holes.


Next I trimmed the sides of the bumpers off and removed about 3/8" from the center section on each side and then re-attached the ends.  I pretty happy with the results. I was going to close the metal work in a little bit more around the corners but I think I will keep the spacing the way it is.