Sunday, March 30, 2014

I don't know if it will ever be hooked up but I re mounted the satellite radio receiver back in the car. I don't want to mount the antenna on the roof so it will be dormant for now.
I finally got around to finishing up the package tray connection to the base of the rear glass.
Since there is no Dutchman panel or rear package tray support I did a little truss work to stiffen up the base of the rear glass bed and the forward trunk lid rim.
Looks a little unorthodox but it did the trick.


I cleaned up the right side inner panel that carries the window regulator. I had intended to make this a removable panel as installing the regulator mechanism is a bit of a nightmare. Also I had intended to try and modify things to accept the window regulator from the 06. I gave up that notion after seeing how complex the motion of the glass is so I decided to weld this panel back in the car permanently. Just as well because this adds some strength to this quarter section.
I used a little trick when bead blasting this part which should save me a little bit of heartache. I tightened some bolts over the ghost marks left on the panel by the assembly bolts and then blasted it. When removed they show a clear outline of where the regulator was bolted up saving me from starting my installation from scratch.
I welded the panel back into place and then used some .060 steel to mend it back to the 06 wheel tub and then painted the whole mess black to make me feel like I was making some progress here.


Monday, March 24, 2014

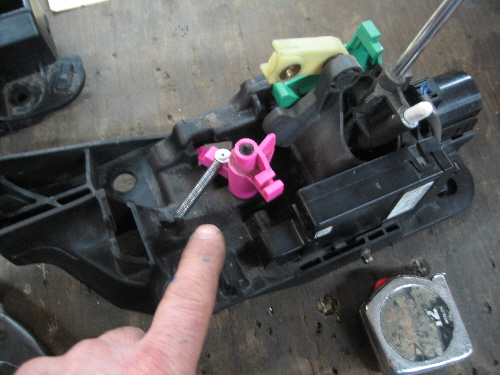
Well since last week I have been spinning my wheels a little and not in a good way. It took me about 5 hours last Saturday to track down why the shifter was locking me out. At first I assumed it was something electrical not releasing the shifter like perhaps the car wanted the doors on an closed or something like that. So I hooked up all of the door harnesses and latches and nothing. The shifter unit is a plastic affair which has a cable that runs to the transmission and a cable that runs to the ignition switch. I decided to try to open the assembly up to at least try to understand it. Inside I found two lock out cams. One (pink)  was attached to the cable leading to the ignition switch. This prevents the shifter from being moved to the right to the gear select alley when the key is in the off position. A mechanical neutral safety switch. When the key is on the cable goes slack and the cam is suppose to move out of the way and allow the shifter into the alley. The green cam was actuated by a solenoid and allows the shifter down the alley to the various shift positions. Assuming there was something wrong with the solenoid I isolated it an powered it up and it was fine.
I was stumped until I realized that there was nothing to draw the pink cam back when the cable went slack. It is hard to know when something is missing if you have never seen it before. It turns out there was a tang broken off of it that corresponds to one across from it on the housing. I got a return spring and riveted it to the cam and that seemed to be the trick.

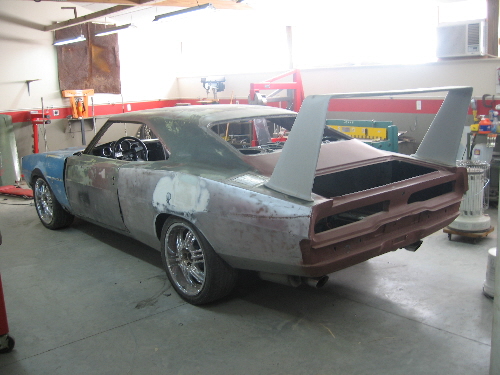
All of this was in pursuit of getting the car running under it's own power so that I could finish getting my North Carolina title. The inspector who had been here a year ago told me that the car did not need to be done. Just get it running under it's own power then give a call for another inspection. I got the car running. I called. He had been reassigned. I got a new guy out. He looked it over and said he would go back and do some paperwork and I would have my title in a couple of weeks.......About 20 minutes later he calls and his boss said "That's the old rule. Now the car must be road worthy. Doors,glass, headlights, blinkers, etc." Massive waste of time.

So the previous Friday I had ordered my wheels and  tires. Tuesday I get a call my wheels are in but the guy said they were a little damaged in shipping. Did I want to come in and look at them and they might sell me them at a discount..... Well two of them looked like they had been dropped from a roof on to concrete. The front rims had a 3 inch flat spot. Bottom line I can't believe they would even try to sell me those at any price and they are ordering me another set.


To get my mind back in the game I decided to re build my quarter window rollers and regulator and figure out how it works.  I had hoped to modify the existing power window module from the 06 to operate these windows but after seeing the tricks that this set up is designed to do I am going to have to rethink it a bit.  The mechanism is really clever in that when it rolls down it has to first retract the glass backwards and then when it pulls it down it rotates the front down faster than the rear in order to accommodate the wheel tub. To all of you veterans of restorations out there I know I am no revealing anything new but I just thought it was pretty spiffy the way it works. Unfortunately for my situation the 06 mechanism is a simple up/down unit that runs on a cabling system. I am not sure the motor is heavy duty enough to engage this old mechanism.


Sunday, March 16, 2014

The choice of wheels is overwhelming. But in all the wheels I looked at nothing struck me until a guy at work said try Discount Tire. So I went to their web site and the have a couple of dozen choices and I think I have found exactly what will work for me. The problem with the car is that the hubs are really wide because new wheels mount with a prominent face. getting something that looks old school without widening the body is near impossible. These wheels do a little visual trick that seems to work. Instead of the center sticking out like a dome the spokes cut inward. At the very end of the spokes they cut back to allow for a dished effect. Also seems like most wheels are more than 5 spokes which is definitely not old school. I ordered these with 20 x 9's  on Friday. Can't wait to see them.


Sunday, March 9, 2014

More tedious but necessary stuff. Here are some pictures of the remaining trunk close out panels being installed. All the panels  being .040 pre painted aluminum were siliconed and riveted down. Rivets alone over time will loosen because of vibration and while they won't come out the will buzz and rattle.


Finally finished up the right side rocker remodel job. The pictures show the more involved rear portion of the rocker where there was a few complicated webs to cut through before I could cap it off and weld it up.


Time to do a quick mock up again to see where I am at now that the rockers have been modified and the front suspension has been lowered 1.75". I mocked up all of the sheet metal in the stock locations this time and will compensate the front wheel opening by moving the opening forward 2". I am not unhappy with the way it now sits. A much better stance that I did not think would be possible.


Monday, March 3, 2014

While I am finishing up remodeling the right side rocker I decided to work on finishing out the trunk floor  area. Since I don't have the regular floor structure to count on I had to beef up the area on the right and left side of the floor where the wing will transfer the load to the chassis. I first welded a piece of 1 1/2" .049 wall square tube across the back below the floor area to tie the bumper outriggers together. I then ran more 1 1/2" tube front to rear in order to tie into the 06 trunk floor extensions. I welded a small 1/2" stand off from the bolt up on the rear frame to help triangulate the support to the side pieces. It stiffened up the area quite nicely.


Once the substructure was in place I started the process of fabricating the floor panel extensions. I decided to use pre painted .040 aluminum for the close out panels. The pictures show the center panel cleco'd into place.